Description[]
Combat and Defense is the fifth scenario of the Learning Campaign in Empire Earth. It teaches the player the principles of combat within the game.
Briefing[]
A New Capital in the East: 320 - 350 AD
(Combat Tactics in Epochs 1-6 / Towers / Walls / Gates / Siege Equipment)
Roman Emperor Constantince knew the eastern half of his empire had become too big and too remote to be effectively governed from Rome. Another capitol was needed, closer to the Asian provinces. He decided to build his new city on the Bosphorus Straits, near the existing town of Byzantium. And he would call his glorious new city Constantinople.
One should never assume that all will remain peaceful. To protect Constantinople, you will train an army and be shown the basics of combat. You will also construct Walls and Towers.
History[]
When Constantine the Great became sole Ruler of Rome in 306 AD, his first priority was to restore to the Empire. It had been divided into Eastern and Western halves fifty years earlier by the Emperor Diocletian. Each half was administered by its own emperor known as "Augustus", assisted by hand-chosen heir known as "Caesar".
This arrangment - called a tetrachy, or 'rule by four' -- would not suit Constantine.
He reunited East and West under his direct imperial authority. But he soon learned that this vast realm could not be governed from the city of Rome. A new capital was needed, closter to Roman territory in Asia and Africa. It would replace an earlier capital built by Diocletian, the city of Nicomedia.
This new capital was to be called Constantinople, which means "Constantine's City".
But the eastern empire would always be known as the Byzantine Empire, after the sleepy town Constantine had transformed into a teeming metropolis.
Objectives[]
- Join the Emperor and his royal escort in Byzantium, where he will be updated on the situation by his Imperial Advisor
- Create 6 Phalanx units in the Barracks.
- Use your Phalanx units to kill all the Isaurian horsemen.
- Train 6 Short Swordsmen in your Barracks.
- Use your Short Sword units to kill all the Isaurian Simple Bowmen.
- Create 6 Chariot Archers.
- Use your Chariot Archers to kill all the Isaurian Javelin units.
- Build enough sections of Wall to enclose all of the buildings of Byzantium. You have been given control of the Citizens of Byzantium to do this.
- Build at least one Gate.
- Build at least two Towers.
- Create 2 Stone Throwers and 2 Catapults, then load them onto the Transport waiting near the Dock.
- Bring 2 Stone Throwers and 2 Catapults to Nicomedia.
- Destroy the Gates of Nicomedia.
Civilizations[]
Emperor Constantine
Emperor Constantine's people are the ones you are able to control in this scenario.
Isaurian Hill Tribes
The main enemies in the scenario, they are the ones hampering in the construction of Constantinople. They consist of six Horsemen, eight Simple Bowmen, nine Javelins and zero citizens. They have no buildings either. Their soldiers are sent in waves and are used in practicing combat tactics.
Roman Army
The Roman Army automatically takes over military units as soon as their use in combat tactics is over. They are very successful in sending in units to their deaths.
'Byzantium
The city of Byzantium is the site of the future capitol Constantinople. It is where Emperor Constantine creates his military units, and possesses ten Citizens. It contains a Temple, a Barracks, an Archery Range, a Siege Factory, a Town Center, a Dock, a Granary and twenty-nine Houses. It also has a Transport ship which is later commandeered for Constantine's use. It is at the Bronze Age
Rome
Emperor Constantine himself and his Imperial Advisor fall under Rome's power.
Nicomedia
Nicomedia, neighbour to Byzantium and former capital of Rome, revolts against Constantine near the end of the scenario. They have no military units and eight Citizens. The city contains an Archery Range, a Barracks, a Stable, a Temple and forty-six Houses. They also have three full Granaries outside the city. They are also at the Bronze Age.
Walkthrough[]
As it is a learning scenario, it is best to experiment and learn while paying careful attention to what is explained. However, if you want a quick run through it:
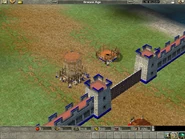
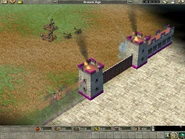
Train six Phalanx units at the Barracks. When given the go ahead, use them to attack the Isaurians. Repeat this procedure with six Short Swords and six Chariot Archers. When the Isaurians are defeated, use the Citizens to build Walls around the buildings (as shown in the gallery below). Build two Towers as well. Build two Stone Throwers and two Catapults and load them onto the Transport ship at the Dock. Drop the siege machines off at the designated area and send the machines to attack the Gates of Nicomedia. Once the gates are destroyed, you will have completed the scenario.
Storyline[]
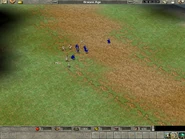
Emperor Constantine and his escort stand before the Barracks awaiting the Imperial Advisor. All around them are the buildings of Constantinople.
Imperial Advisor: Welcome to the future site of glorious Constantinople, sire! Preparations are proceeding well, but Isaurian warriors camped in the mountains have been giving us some trouble. We need troops to defend against them. Select the Barracks and use the Phalanx button to train six Phalanx foot soldiers. We currently have just enough resources to accomplish this. Remember that you can queue up units.
As the first Phalanx unit exits the Barracks...
Imperial Advisor: We know the Isaurians attack in waves, sending their units armed with shock weapons first. Shock weapons like swords are best couterattacked with piercing weapons like spears, such as those carried by our Phalanx units.
A little while later...
Imperial Advisor: Our small army is ready just in time. Isaurian raiders have been sighted riding towards the city...
But look, the Chariot Archers of your Imperial Guard are trying to attack the Isaurians!
Several Horseman come down from the mountains and are met by the Chariot Archers. After a brief fight, all of the Chariot archers killed.
Imperial Advisor: Alas! Your Imperial Guard has been wiped out! They were courageous but foolhardy, my lord. As you see, arhcers are not effective against soldiers armed with shock weapons.
Fortunately, the Isaurians have retreated for now. But they will return. When they do, use your spear-wielding Phalanxes to wipe them out.
Once all six of the Phalanx units have been trained, they go out and easily defeat the Isaurian Horsemen.
Imperial Advisor: Excellent! Your Phalanxes have eliminated the raiders! As you see: warriors with shock weapons are best countered by soldiers armed with piercing weapons.
Soon the Isaurians will send a second wave of warriors. These are sure to be archers. We saw earlier that our archers were beaten by their shock weapons, sot train 6 Short Sword units at the Barracks to face their archers. Resources for them are now available.
The Short Swords begin their training. While that is happening...
Imperial Advisor: While the remaining Short Sword men are being trained, sire, let me remind you that you can set a rally point for the Barracks Either use the roudn Set Rally Point button to place a rally flag, or simply right-click on the map while the Barracks is selected. The troops trained at the Barracks will congregate at the rally point.
A little while later...
Imperial Advisor: Isaurian bowmen have been sighted, your highness. It looks like your remaining Phalanxes are taking them on.
Simple Bowmen come down the same way the Horsemen did. The Phalanx units take them on, but are defeated.
Imperial Advisor: The Phalanxes fought courageously but in vain. Units with piercing weapons are not very effective against archers. Send your short swords against the Isaurian bowmen and you will see that they are much better suited for the job.
The Short Swords come and easily dispatch the Simple Bowmen.
Imperial Advisor: The Isaurian bowmen have been defeated! Soldiers armed with swords or other shock weapons are the most effective troops to send against archers.
the third Isaurian attack wave will consist of javelin throwers, who are best countered with archers. You can train new Chariot Archers at this Archery Range. Select the Archery Range and click on the Chariot Archer button. Train a total of 6 Chariot Archers. You have been given enough resources to accomplish this.
While the Chariot Archers are being trained...
Imperial Advisor: This may be a good time to experiment with advanced orders, such as behaviors and formations. Select a group of units and notice the two octagonal buttons that appear above the basic Action buttons...
The first button, on the left, sets the Unit Behavior of the selected troops. Click on this button. New buttons appear to allow you to select a different behavior. A behavior essentially defines the rules of engagement for these troops. Try selecting a new behavior. Note that you'll see a difference in your troops' behavior only when they engage enemy units.
The button next to Set Unit Behavior is the Set Formation button. Clicking it provides you with a set of formation options. Formations are a set of standing orders that tell your troops how to line up at the end of a move order. Try selecting a formation.
Now, with your units still selected, right-click on the ground where you wnat them to move. When they get to their destination, they will line up in the formation you selected.
Try moving those same units again, but this time hold the right mouse button down when you right-click. With the button held dow, moving the mouse displays an arrow. The arrow indicates the direction your units will face when they line up in formation. Choose a direction, release the mouse button, and watch the results.
A little while later...
Imperial Advisor: The final wave of Isaurian javelin throwers has been sighted. The Short Sword men are moving to engage them. You'd think they'd know better by now!
The enemy Javelins, coming down from another mountain, meet and destroy the remaining Short Swords.
Imperial Advisor: The Short Sword men were completely wiped out. Swords and other shock weapons are not very effective against piercing weapons. But now you can use your new Chariot Archers to annihilate the enemy Javelin units.
The Chariot Archers drive out and fight the Javelins. The Javelins are soon destroyed.
Imperial Advisor: The Isaurian Javelins have been defeated by your Chariot Archers! As you see, archers can be very effective when used properly. Always remember sire, arrows beat piercing weapons, piercing weapons beat shock weapons, and shock weapons beat arrows.
With our borders safe for now, it is time to transform Byzantium into Constantinople. The first order of business is to construct defensive Walls. Walls require Stone, which has been provided for you.
To build Walls, select one or more Citizens and left-click on the Wall button. Then left-click on the map to indicate the starting point for your Wall. When you move the mouse across the terrain, a "ghost" version of the Wall appears. Left-click again on the location where you wish this sectoin of you Wall to end. You can now left-click a third time to place annother section of wall, attached to the first. Right-click at any time to stop placing Walls.
If this seems complicated, sire, don't worry. You'll soon get the hang of it.
A Citizen starts working on the Wall foundations.
Imperial Advisor: Even though Wall construction has been started, you can make the work go faster by assigning more Citizens to the task. Just select more Citizens, then right-click on a Wall foundation.
More Citizens are made to work on the Walls.
Imperial Advisor: If you attempt to lay down Wall, but have run out of Stone, Wall foundations will not appear. You will have to try again when you have sufficient Stone. Also note that individual units of Wall cannot be built on existing objects, like trees and buildings, or on water. But the rest of the Wall will be built around these obstacles. You can go back to fill in gaps later.
Your new Wall is coming along superbly, highness. Just 25 more Wall sections will bring us very close to completion.
Don't worry about closing yourself in with Walls, sire. When you're ready, I'll show you how to build Gates.
As the work progresses...
Imperial Advisor: Excellent. Your new Wall is nearly complete. You should look around and fill in any gaps that may still remain.
Once at least 25 sections of Wall has been built...
Imperial Advisor: Now it's time to put in a Gate. Left-click on any straight secion of Wall. You'll see a Gate button at the lower-left hand corner of your screen. Click on this button and straight sections of wall where Gate can be placed will be highlighted green. Move the mouse pointer over the green Walls and a "ghost" Gate will appear. To build a Gate whre the ghost is, simply left-click and it will be placed there immediately.
A Gate location is picked and the Gate is built.
Imperial Advisor: Well done! Notice that you do not need Citizens to build Gates, and GAtes do not cost you any additional Stone. As long as you have a straight section of Wall that is 5 sections long, you can make a Gate. Gates only open for you and your allies, sire. But if you lock a Gate by clikcing its Lock button, no one can pass through.
In addition to Wall and Gates, you can defend your city with Towers.
Select one or more Citizens. You'll see that the Tower button is now available. Click the button, then left-click on the site where you want the Tower to be built. Like Walls, towers cost Stone. Build at least two Towers to demonstrate to the people that Constantinople will be secure against her enemies.
The Citizens selected come forward to work on the Towers. Once one is finished...
Imperial Advisor: Building defensive Walls and Towers is a good step forward, my lord. But what if you need to destroy the Walls and Towers of your enemies? The most effective way to do this is with siege engines, which can be produced only at a Siege Factory. There is one already built in the city for your use.
Alarming new has arrived, your highness! The city of Nicomedia is in revolt! They fear the rising power of Constantinople.
A demonstration of your authority is needed. Produce two Catapults and two Stone Throwers at your Siege Factory. Just up the river, a Transport is waiting for them. When the siege engines are finished, load them on the Transpot by selecting them and right-clicking on the Transpot.
The siege engines are built and loaded onto the Transport ship.
Imperial Advisor: With the siege equipment loaded aboard, the Transport can be sailed across the river and unloaded. Flags have been set to show a safe place to unload. Select the loaded Transport and click the Unload button. Then right-click on the shore nest to the flags. The Transport will sail to that locatoin and unload the siege equpment.
The Transport ship sails across and unloads onto the designated area.
Imperial Advisor: Good! Now, if you destroy the Gates of Nicomedia, it will be enough to show them who is boss. Select your siege engines and right-click on their Gate to start the attack.
The order is given, and while the siege engines are on their way to attack...
Imperial Advisor: Not that Stone throwers do splash damage and are therefore good against a massed group of people. Catapults, on the other hand, do more damage at impact and so are more effective against structures like Walls, buildings, and Gates. Both can be used in you attack on Nicomedia.
The siege engines attack the Gates. Soon enough, it is destroyed and comes crumbling down.'
Imperial Advisor: Your show of force has been successful, Emperor. The rebels of Nicomedia have surrendered. And, with the new government firmly established at Constantinople, theis region has been secured for the the future. Long live the Empire!
Gallery[]


